
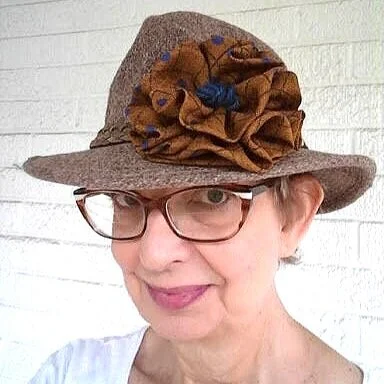
This silk flower is fun to make and it’s a great way to use unwanted neckties!
Supplies needed are:
one silk twill or silk brocade necktie, (The best is a wider tie made of silk twill. A silk brocade tie also works but it is a stiff weave so it’s a little more difficult to work with.)
all-purpose thread,
2 feet of embroidery floss or yarn,
2” square of craft felt,
standard long hand sewing needle for the thread
large( doll-making sized) needle for the floss or yarn,
seam ripper,
fabric scissors,
large safety pin if you are making a brooch or a barrette if you are making a hair accessory.
Before you start, pre-wash the necktie if needed, with water and dish soap and hang to dry.
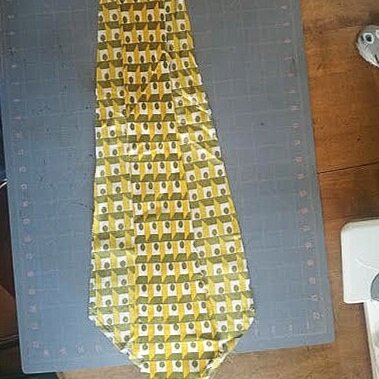
Deconstruct the necktie by removing all the threads, interlining and lining.
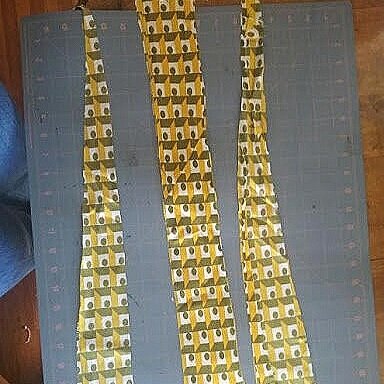
Determine the widest width of the tie narrow end of the tie and trim the rest of the tie to this width.
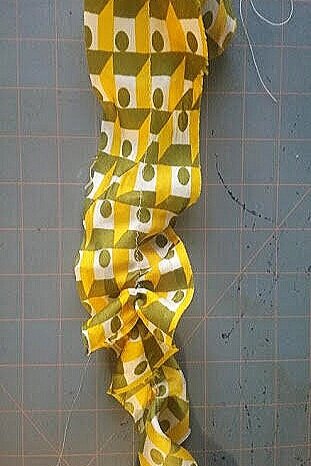
Hand sew ¼” long running stitch or machine sew a basting stitch down the center of the tie.
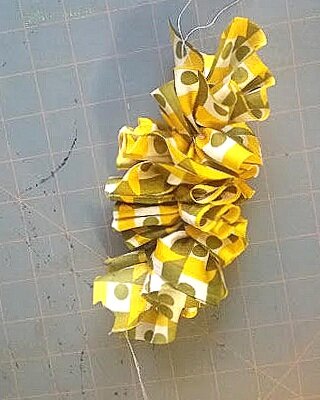
Pull the thread so it gathers the tie tightly. Don’t cut the excess thread yet.
5. Roll the gathered tie strip so the stitching runs down the center of the roll.
6. Wrap the excess thread tightly around the center of the roll so it covers the stitches.
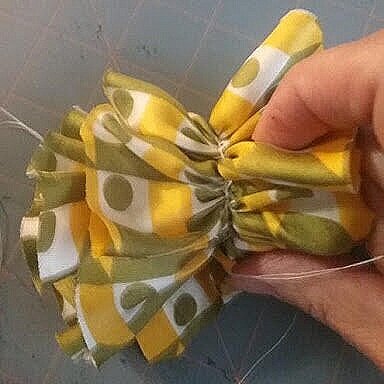
7. Thread some of the excess threads onto the long sewing needle and make several stitches through the center of the roll.
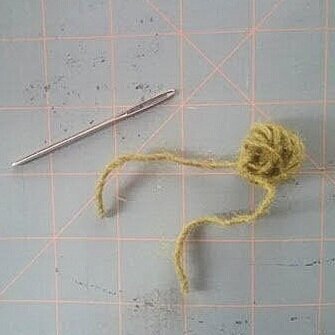
8. Cut about 2 feet of yarn or embroidery floss. Wrap the yarn or floss around the tip of your index finger several times leaving 3 or 4 inches of excess yarn or thread on each side of the wrapped circle. Now wrap the free ends through the center of the wrap a few times to secure. Tie the free ends together.
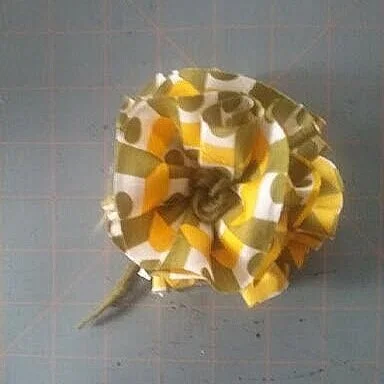
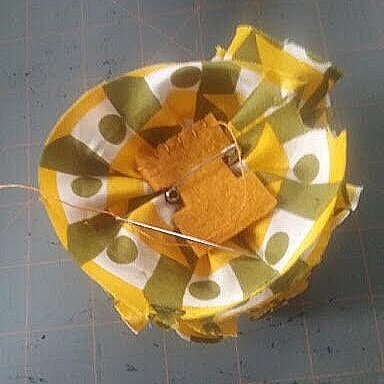
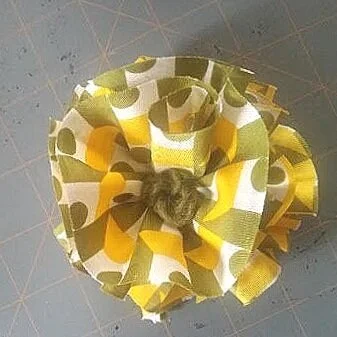
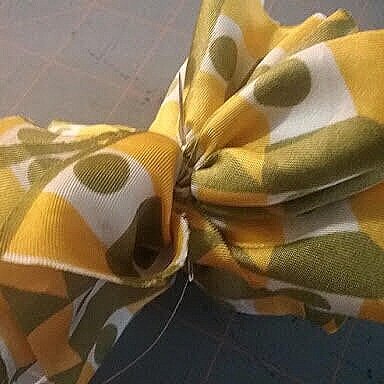
9, Thread the ends of the yarn or floss circle through a yarn or doll needle. Push the needle through the center of the flower until the yarn circle is flush with one side of the flower. Take a couple of stitches with the yarn tails near the center back of the flower to secure it in place.
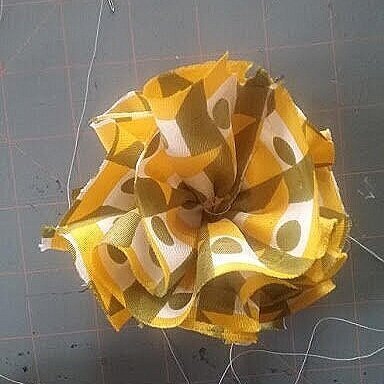
10. Center a safety pin on the back of the flower. Cover with a small square of felt. Hand stitch the felt all the way around the edges to secure the safety pin in place. You could also use a barrette if you’d like a flower for your hair!
Voila!! You have a beautiful accessory.