A New Sewer’s Journey!

Meet our most determined, joyful client, Linda! She truly is one of the funniest, happiest people I have met.
Linda is finishing her FIFTH coat/jacket to be started and completed in the last 18 months. To flesh out the picture, I met Linda about two years ago when she took a pants class at a fabric store, and I was the instructor. She came with the pants already cut out, and I thought maybe a raccoon had nibbled the fabric away. (Sorry, raccoons; yes, Linda had already read this before I published it.) After a few hours, I asked if she was left-handed, which explained the tortured fabric and her tortured left hand using right-handed scissors.

One of our very first customers…

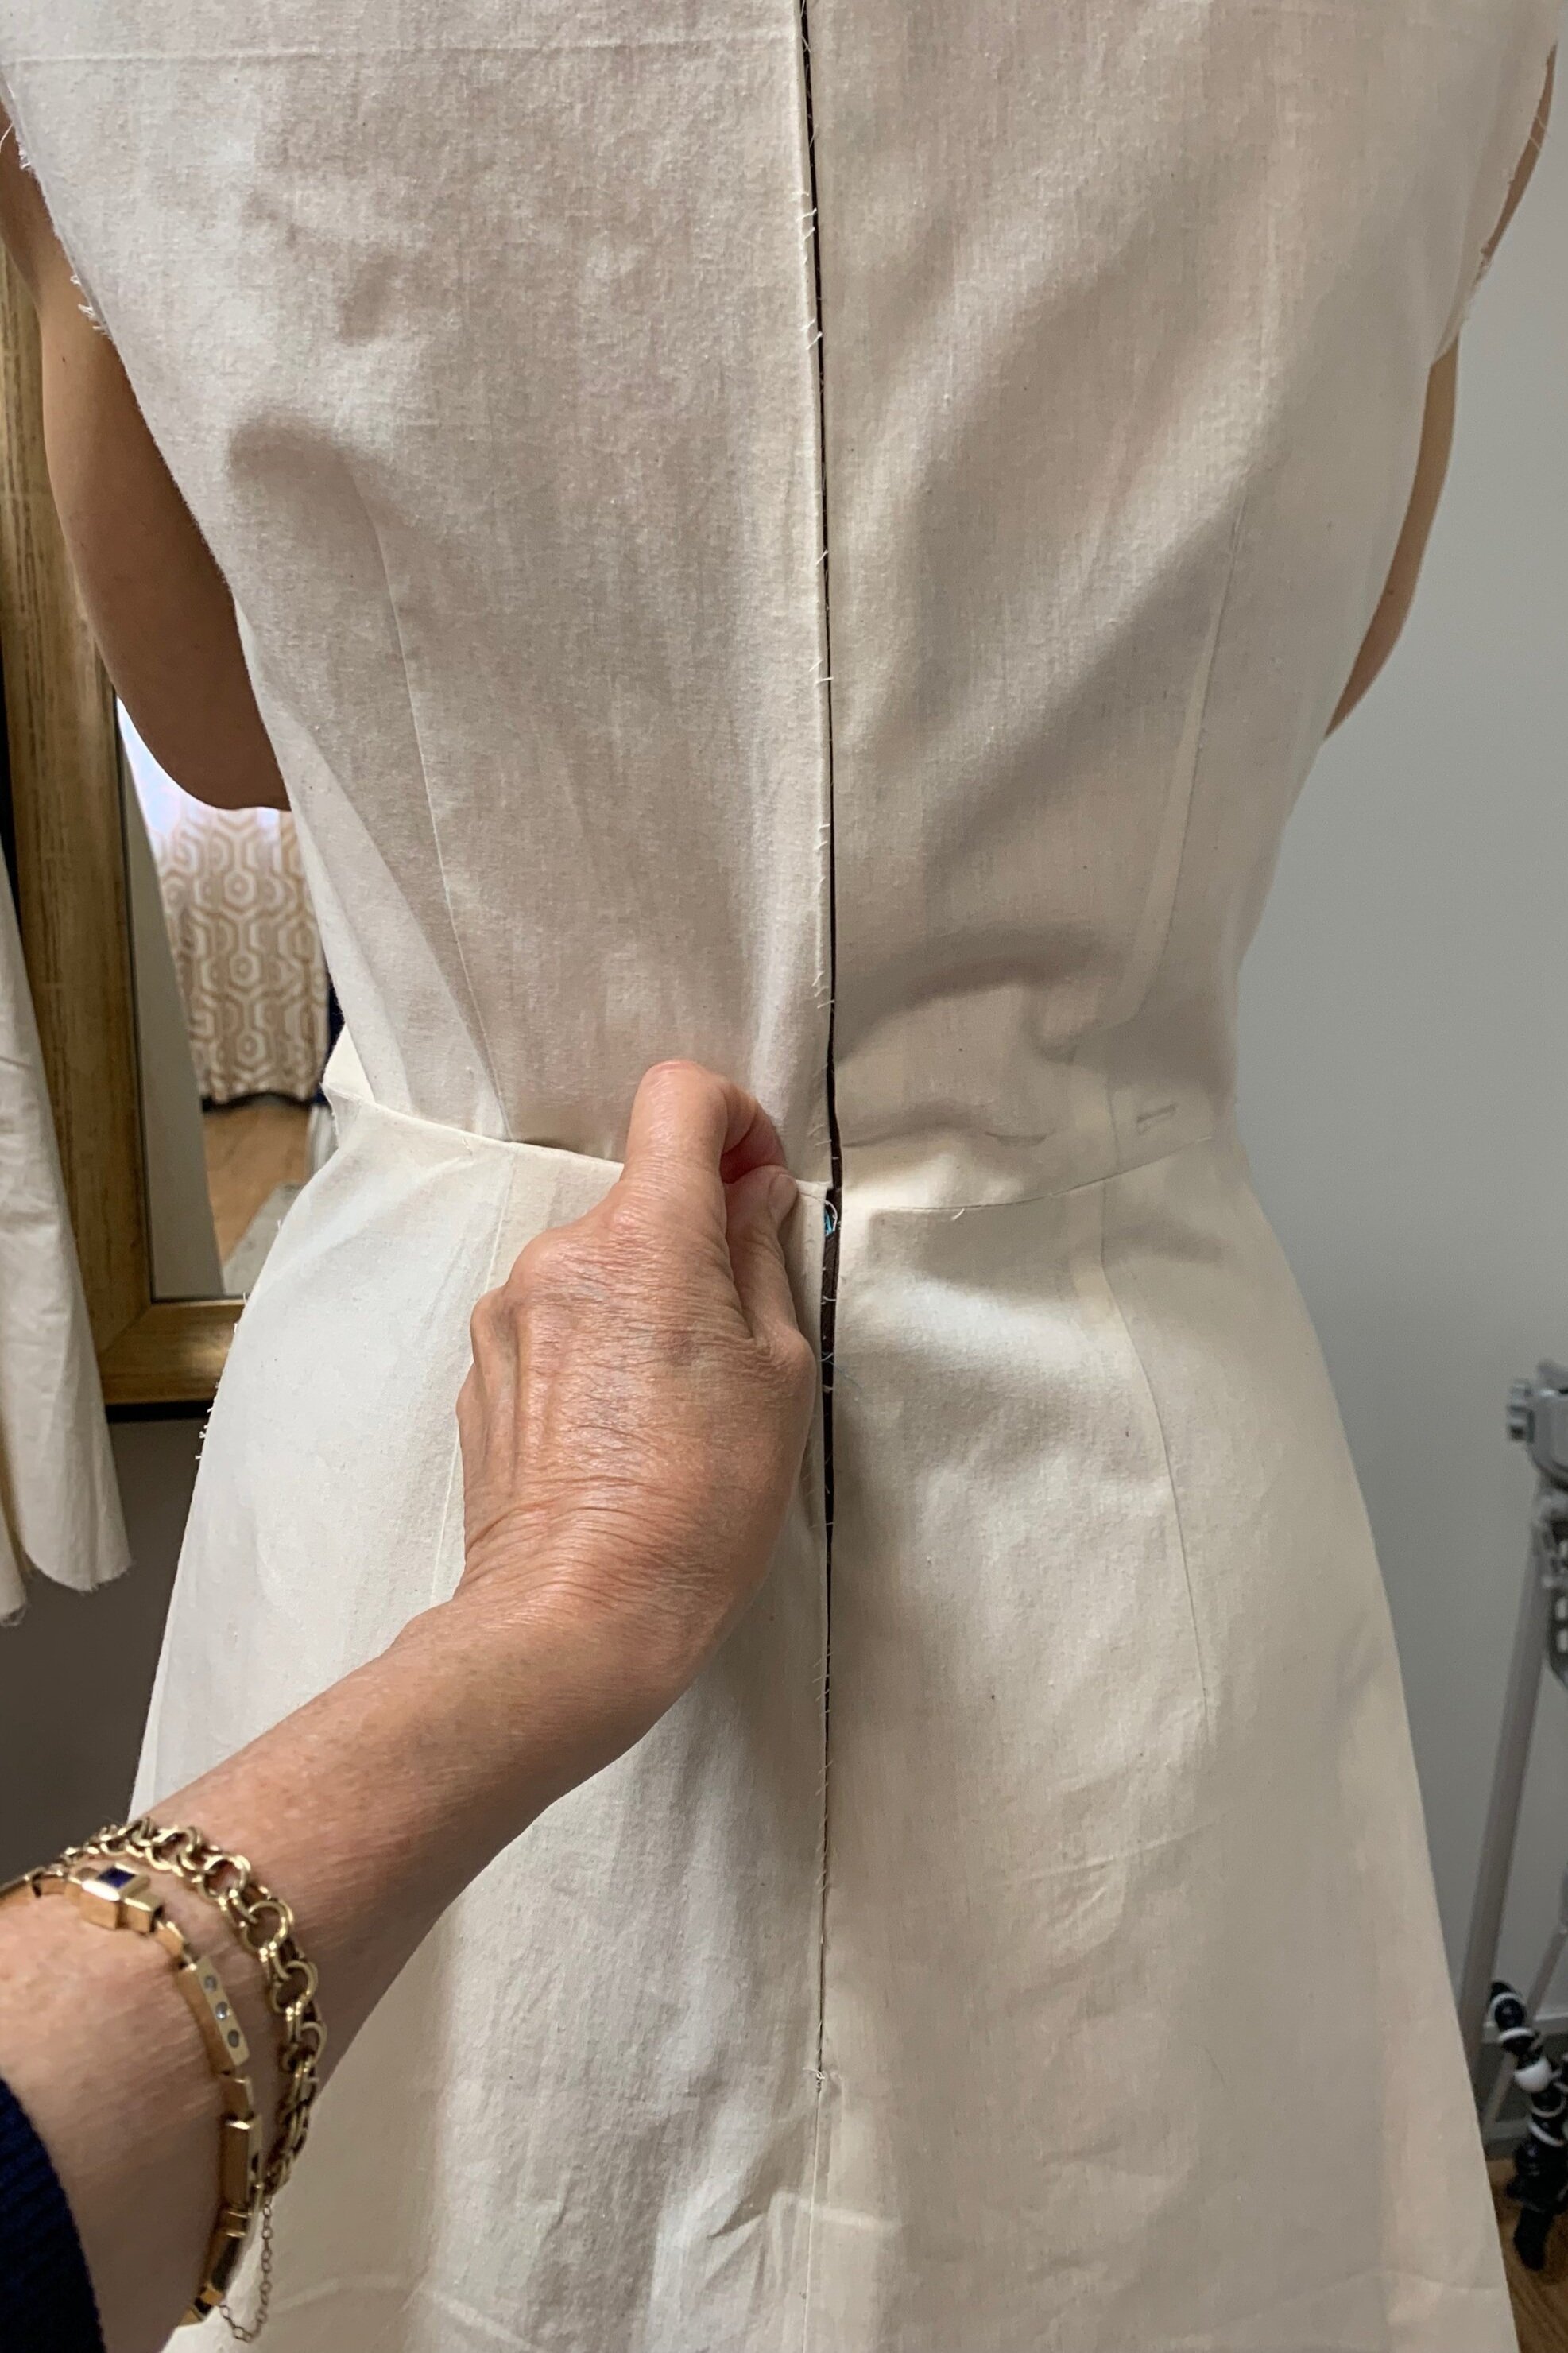
Not one to be happy just to stick her toe into the water, Linda plunged right in to learn everything she could about sewing outstanding garments. Recently retired, she had a beautiful white wool fabric, purchased many years ago while she was working, and she wanted to make a jacket. After seeing the beautiful fabric, we talked about maybe working on some linen first.

The very next project was the Kelly Anorak trench with lining.

Never one to shy away from a tough fabric if that was the correct fabric, Linda sourced a water resistant material from Seattle Fabrics, and the lining from Liberty of London. Zippers, snaps, grommets….she gamely tackled it all. She has a beautiful light weight trench she wears proudly.
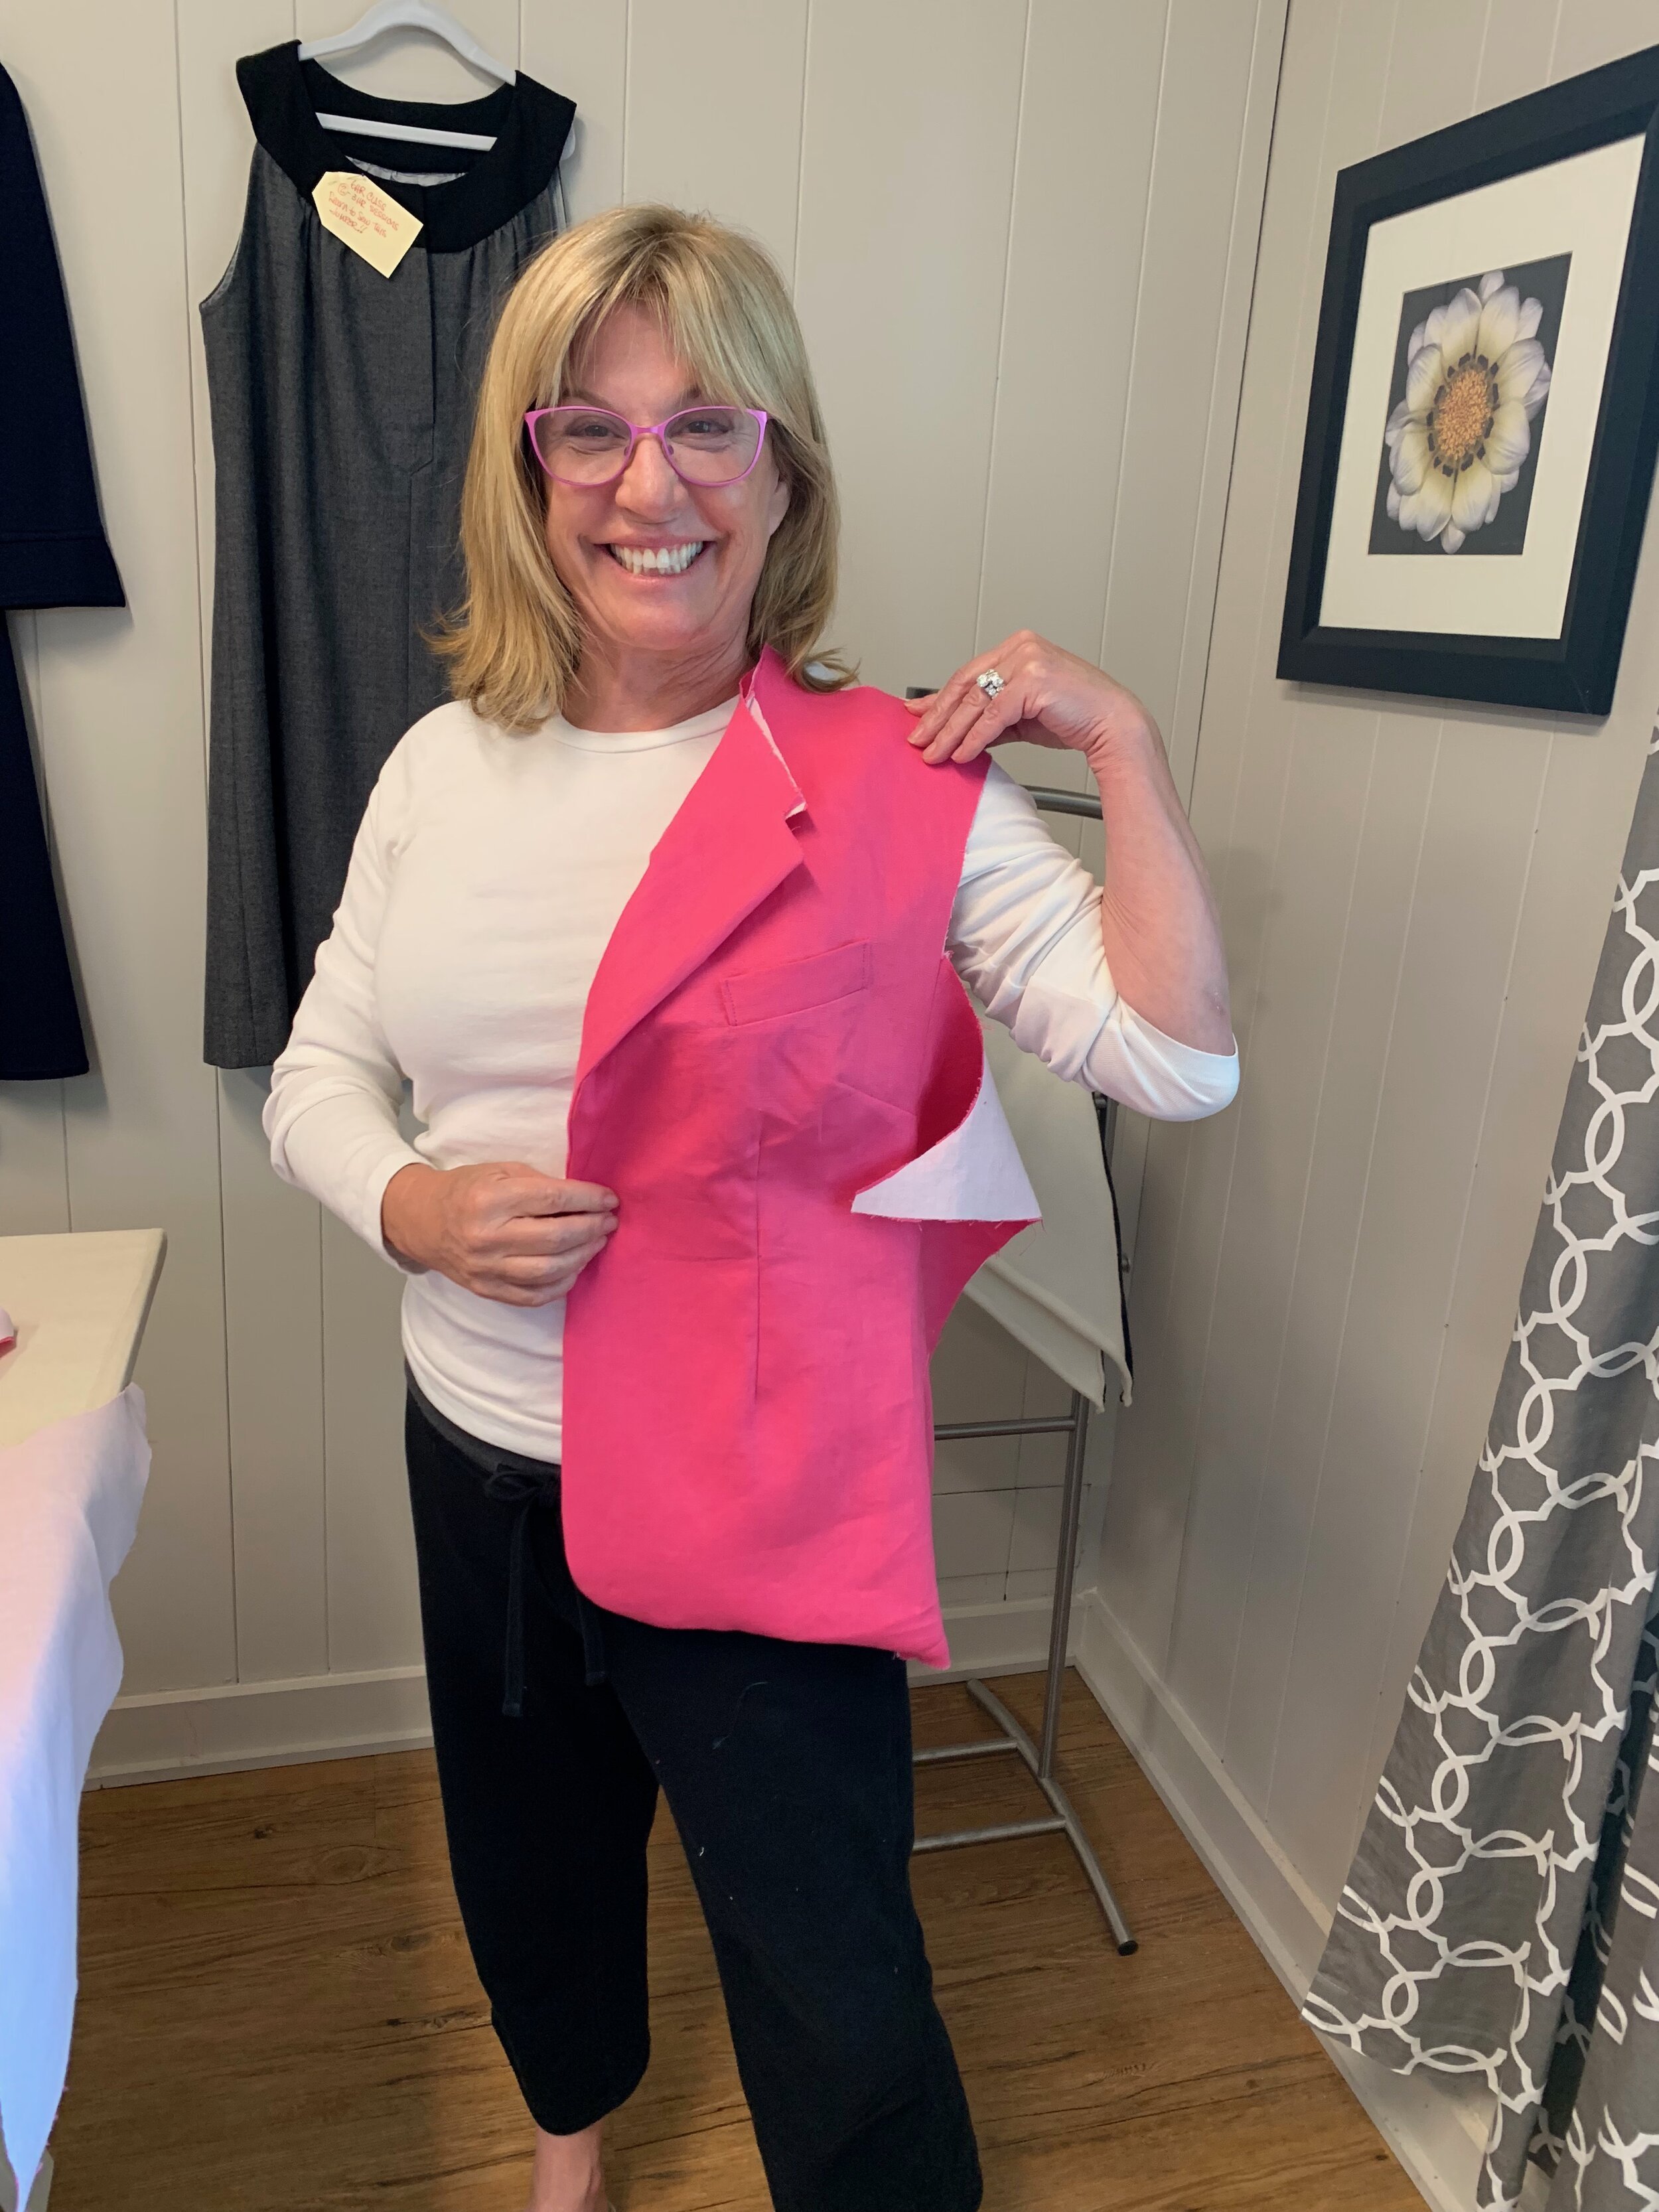
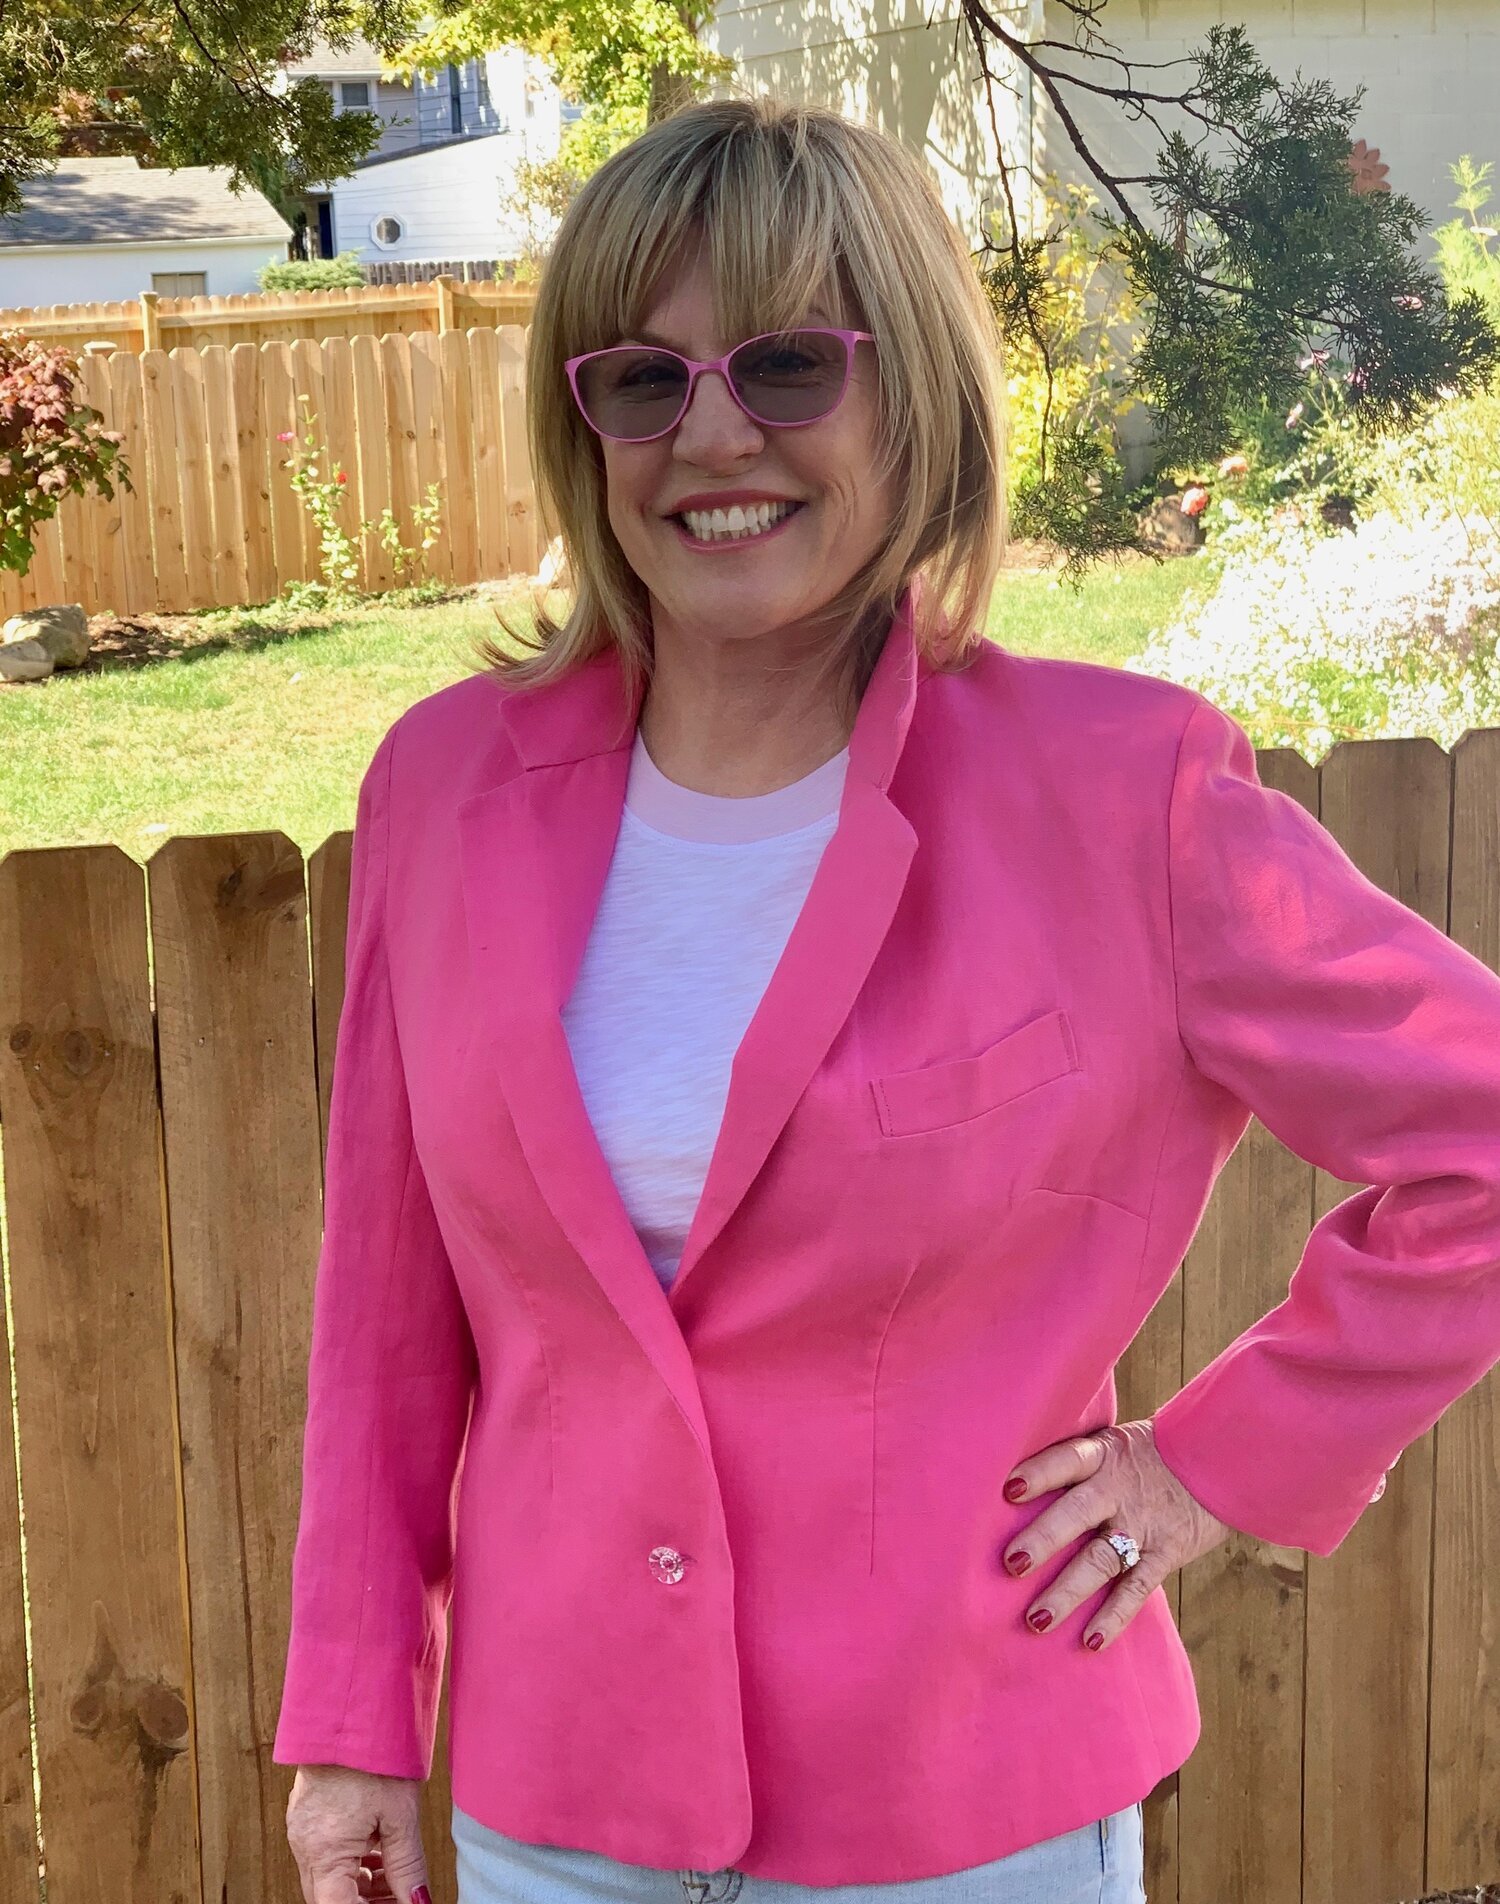
The next project

…was a white wool winter coat, belted, with fake fur buttons that add flair and Linda’s distinctive style.

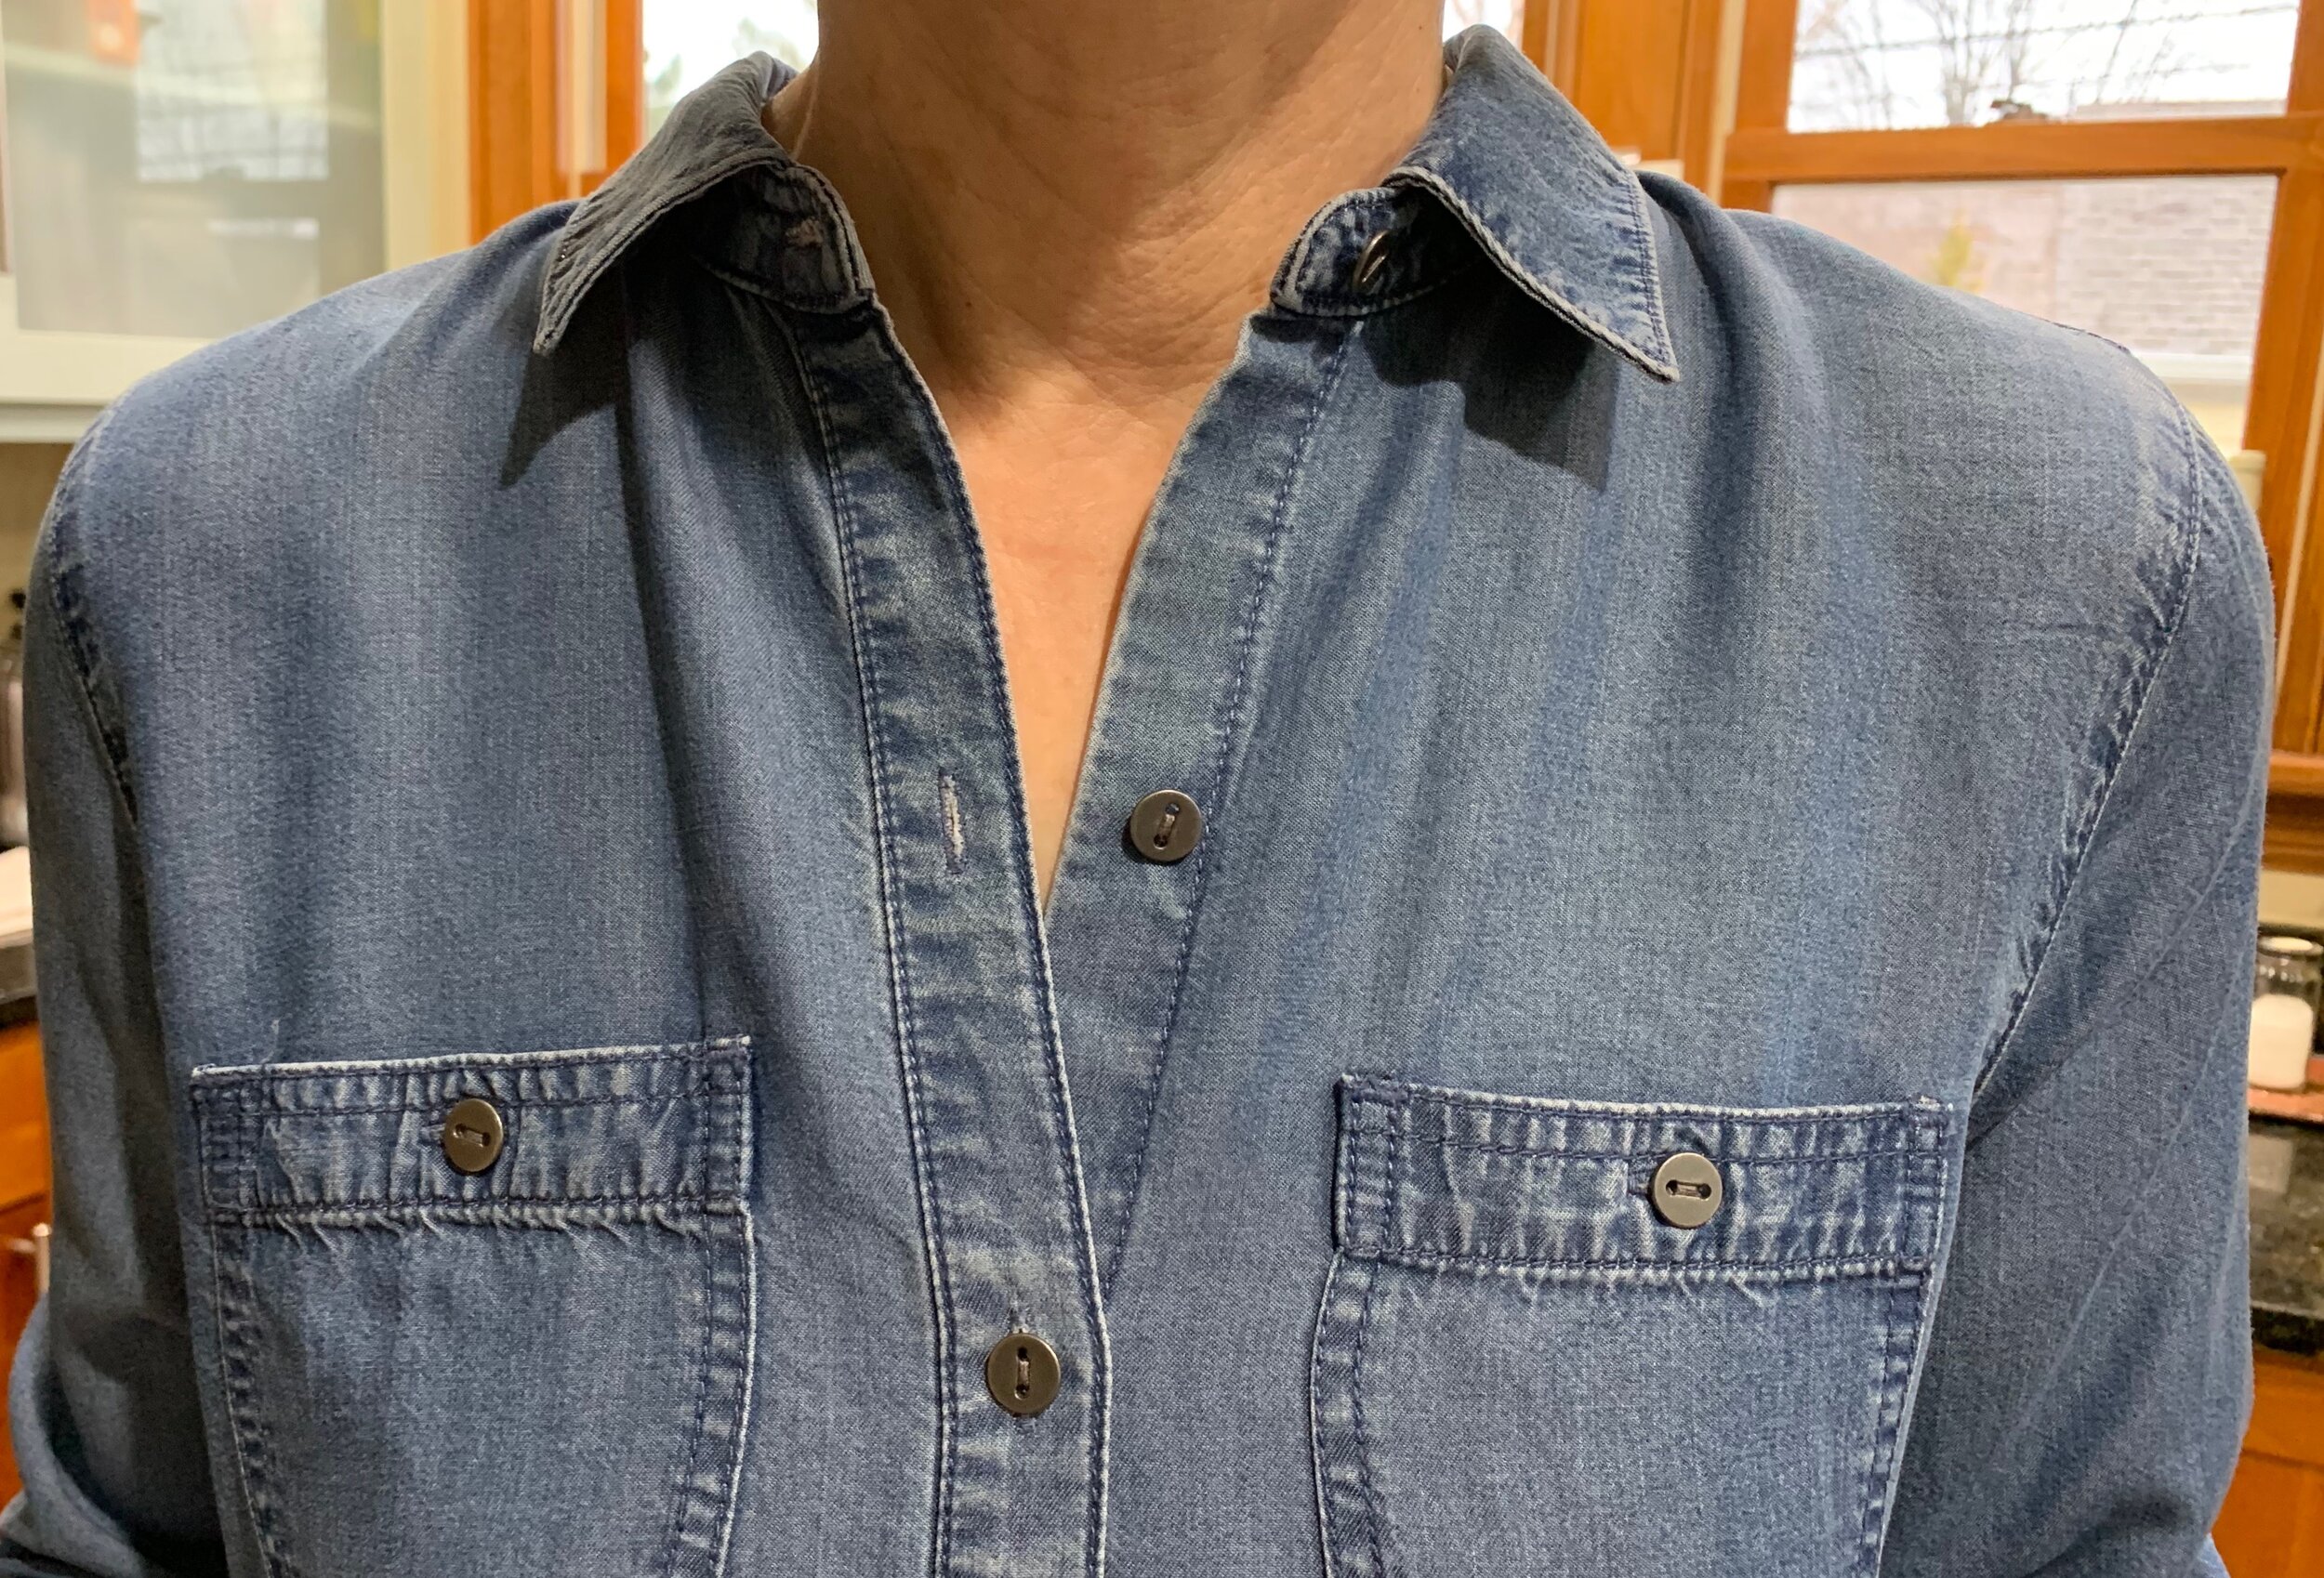
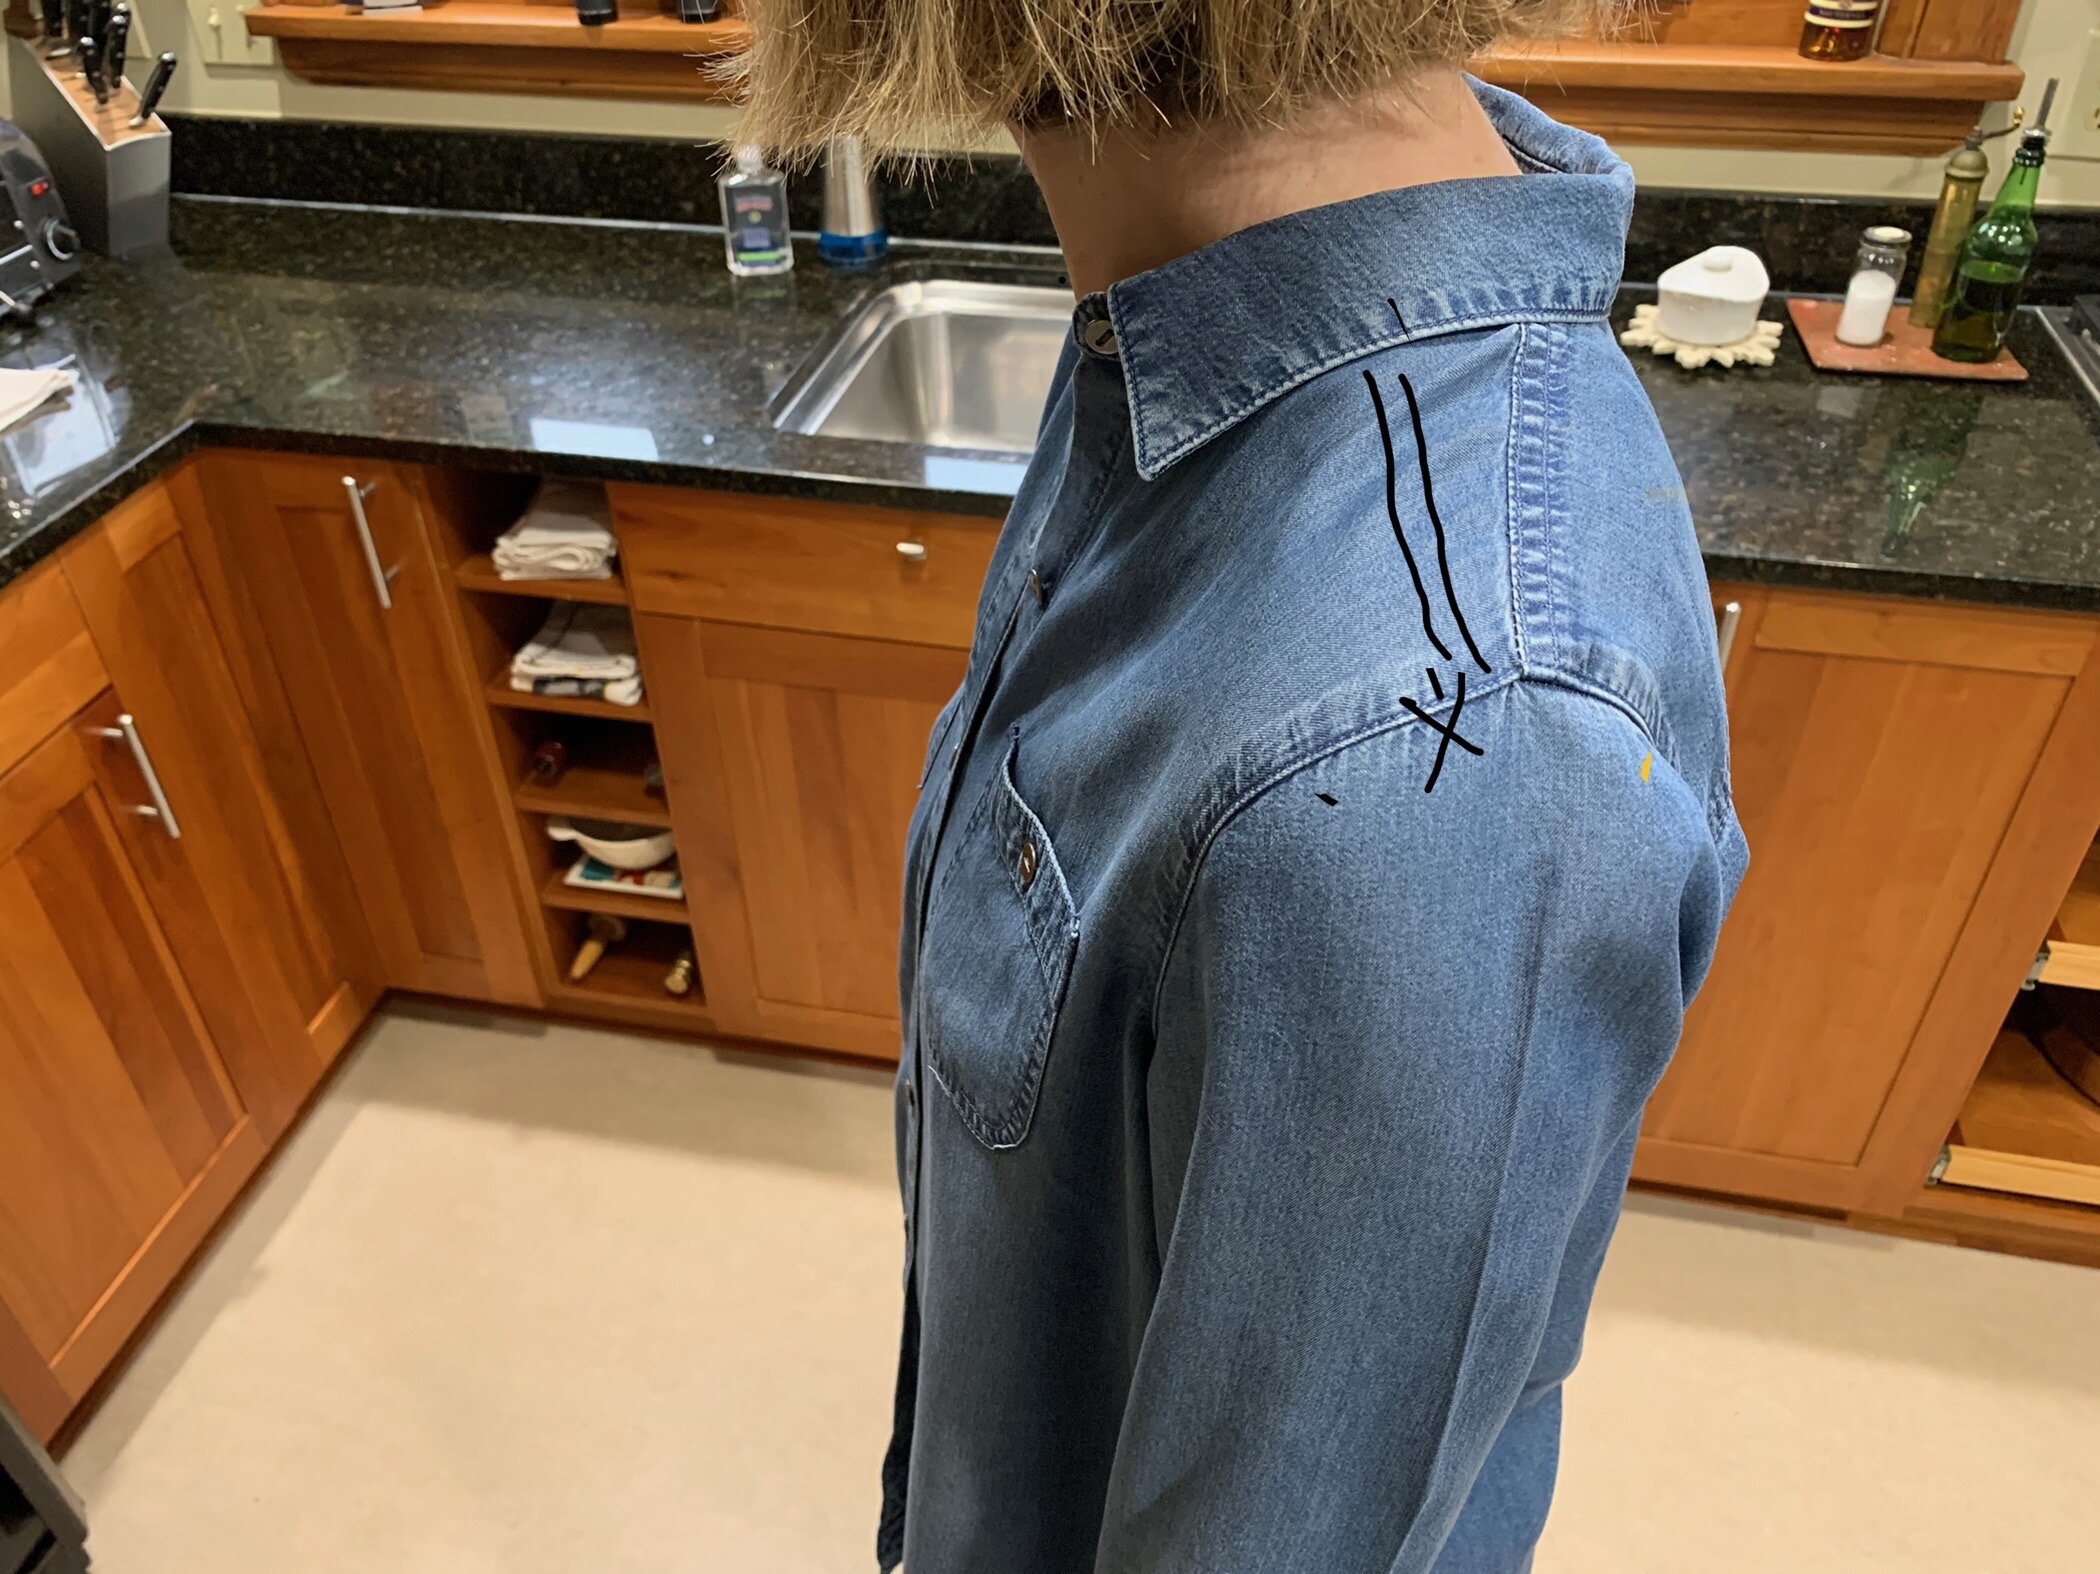
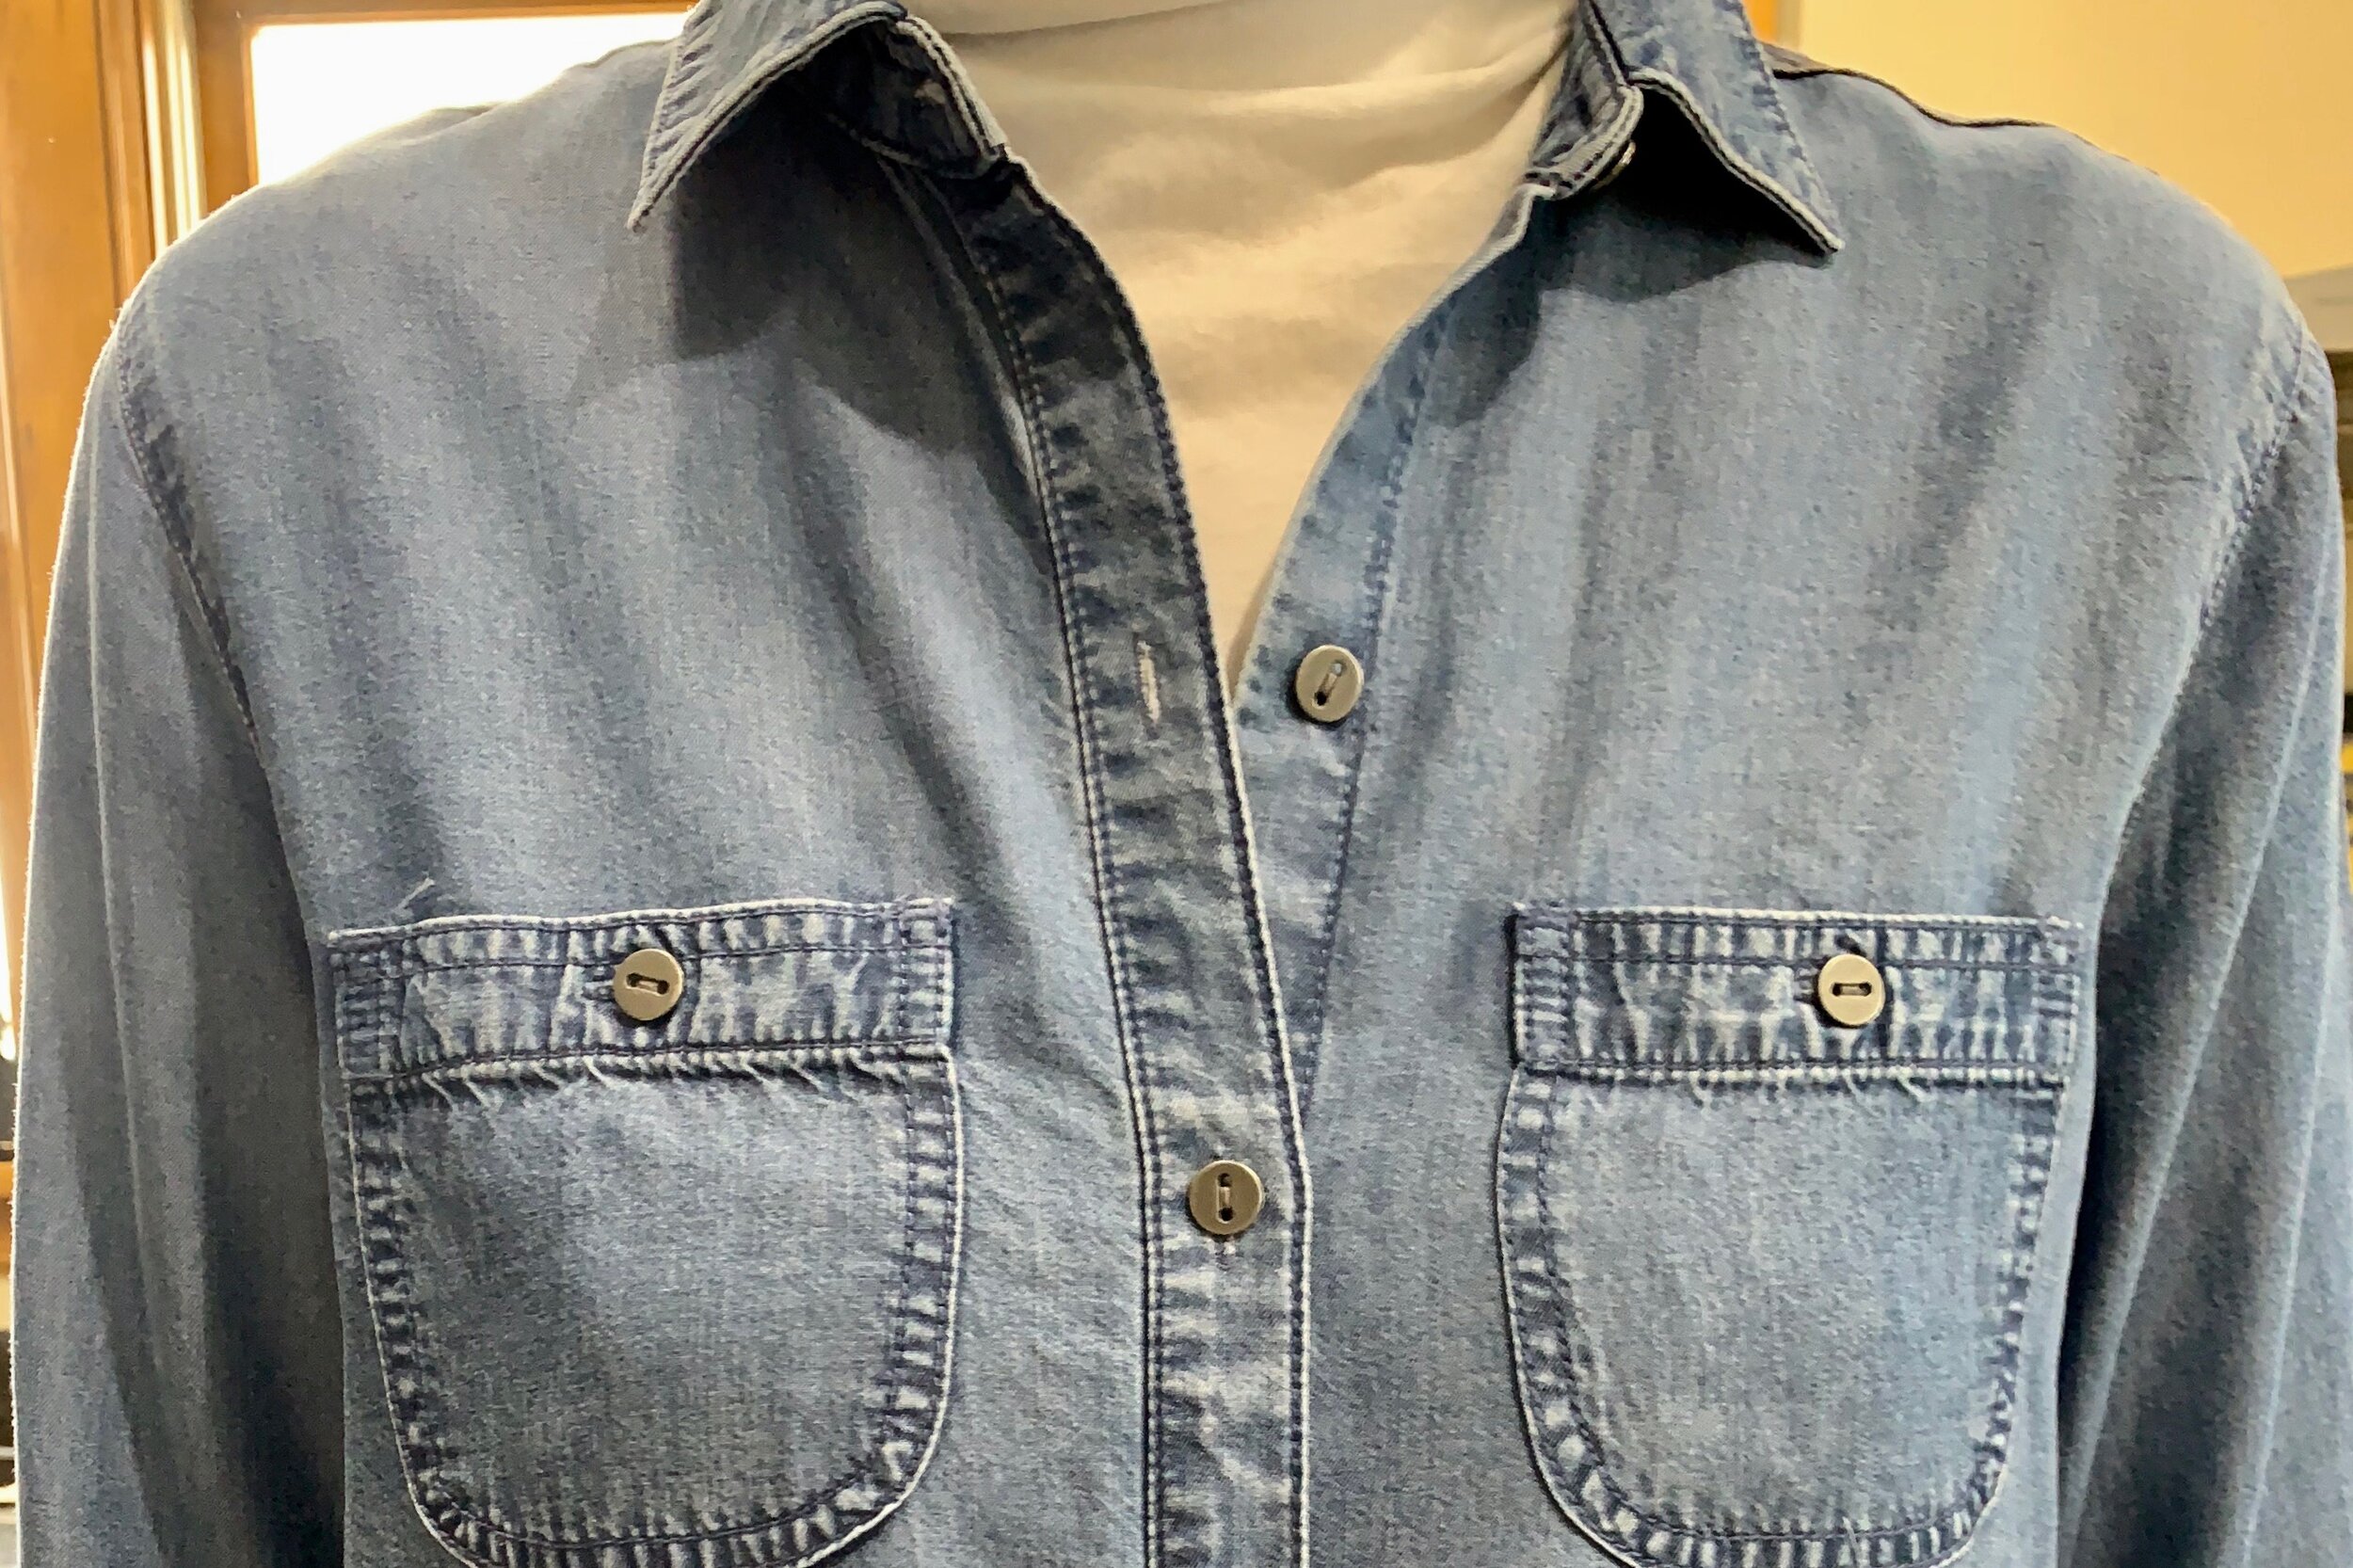
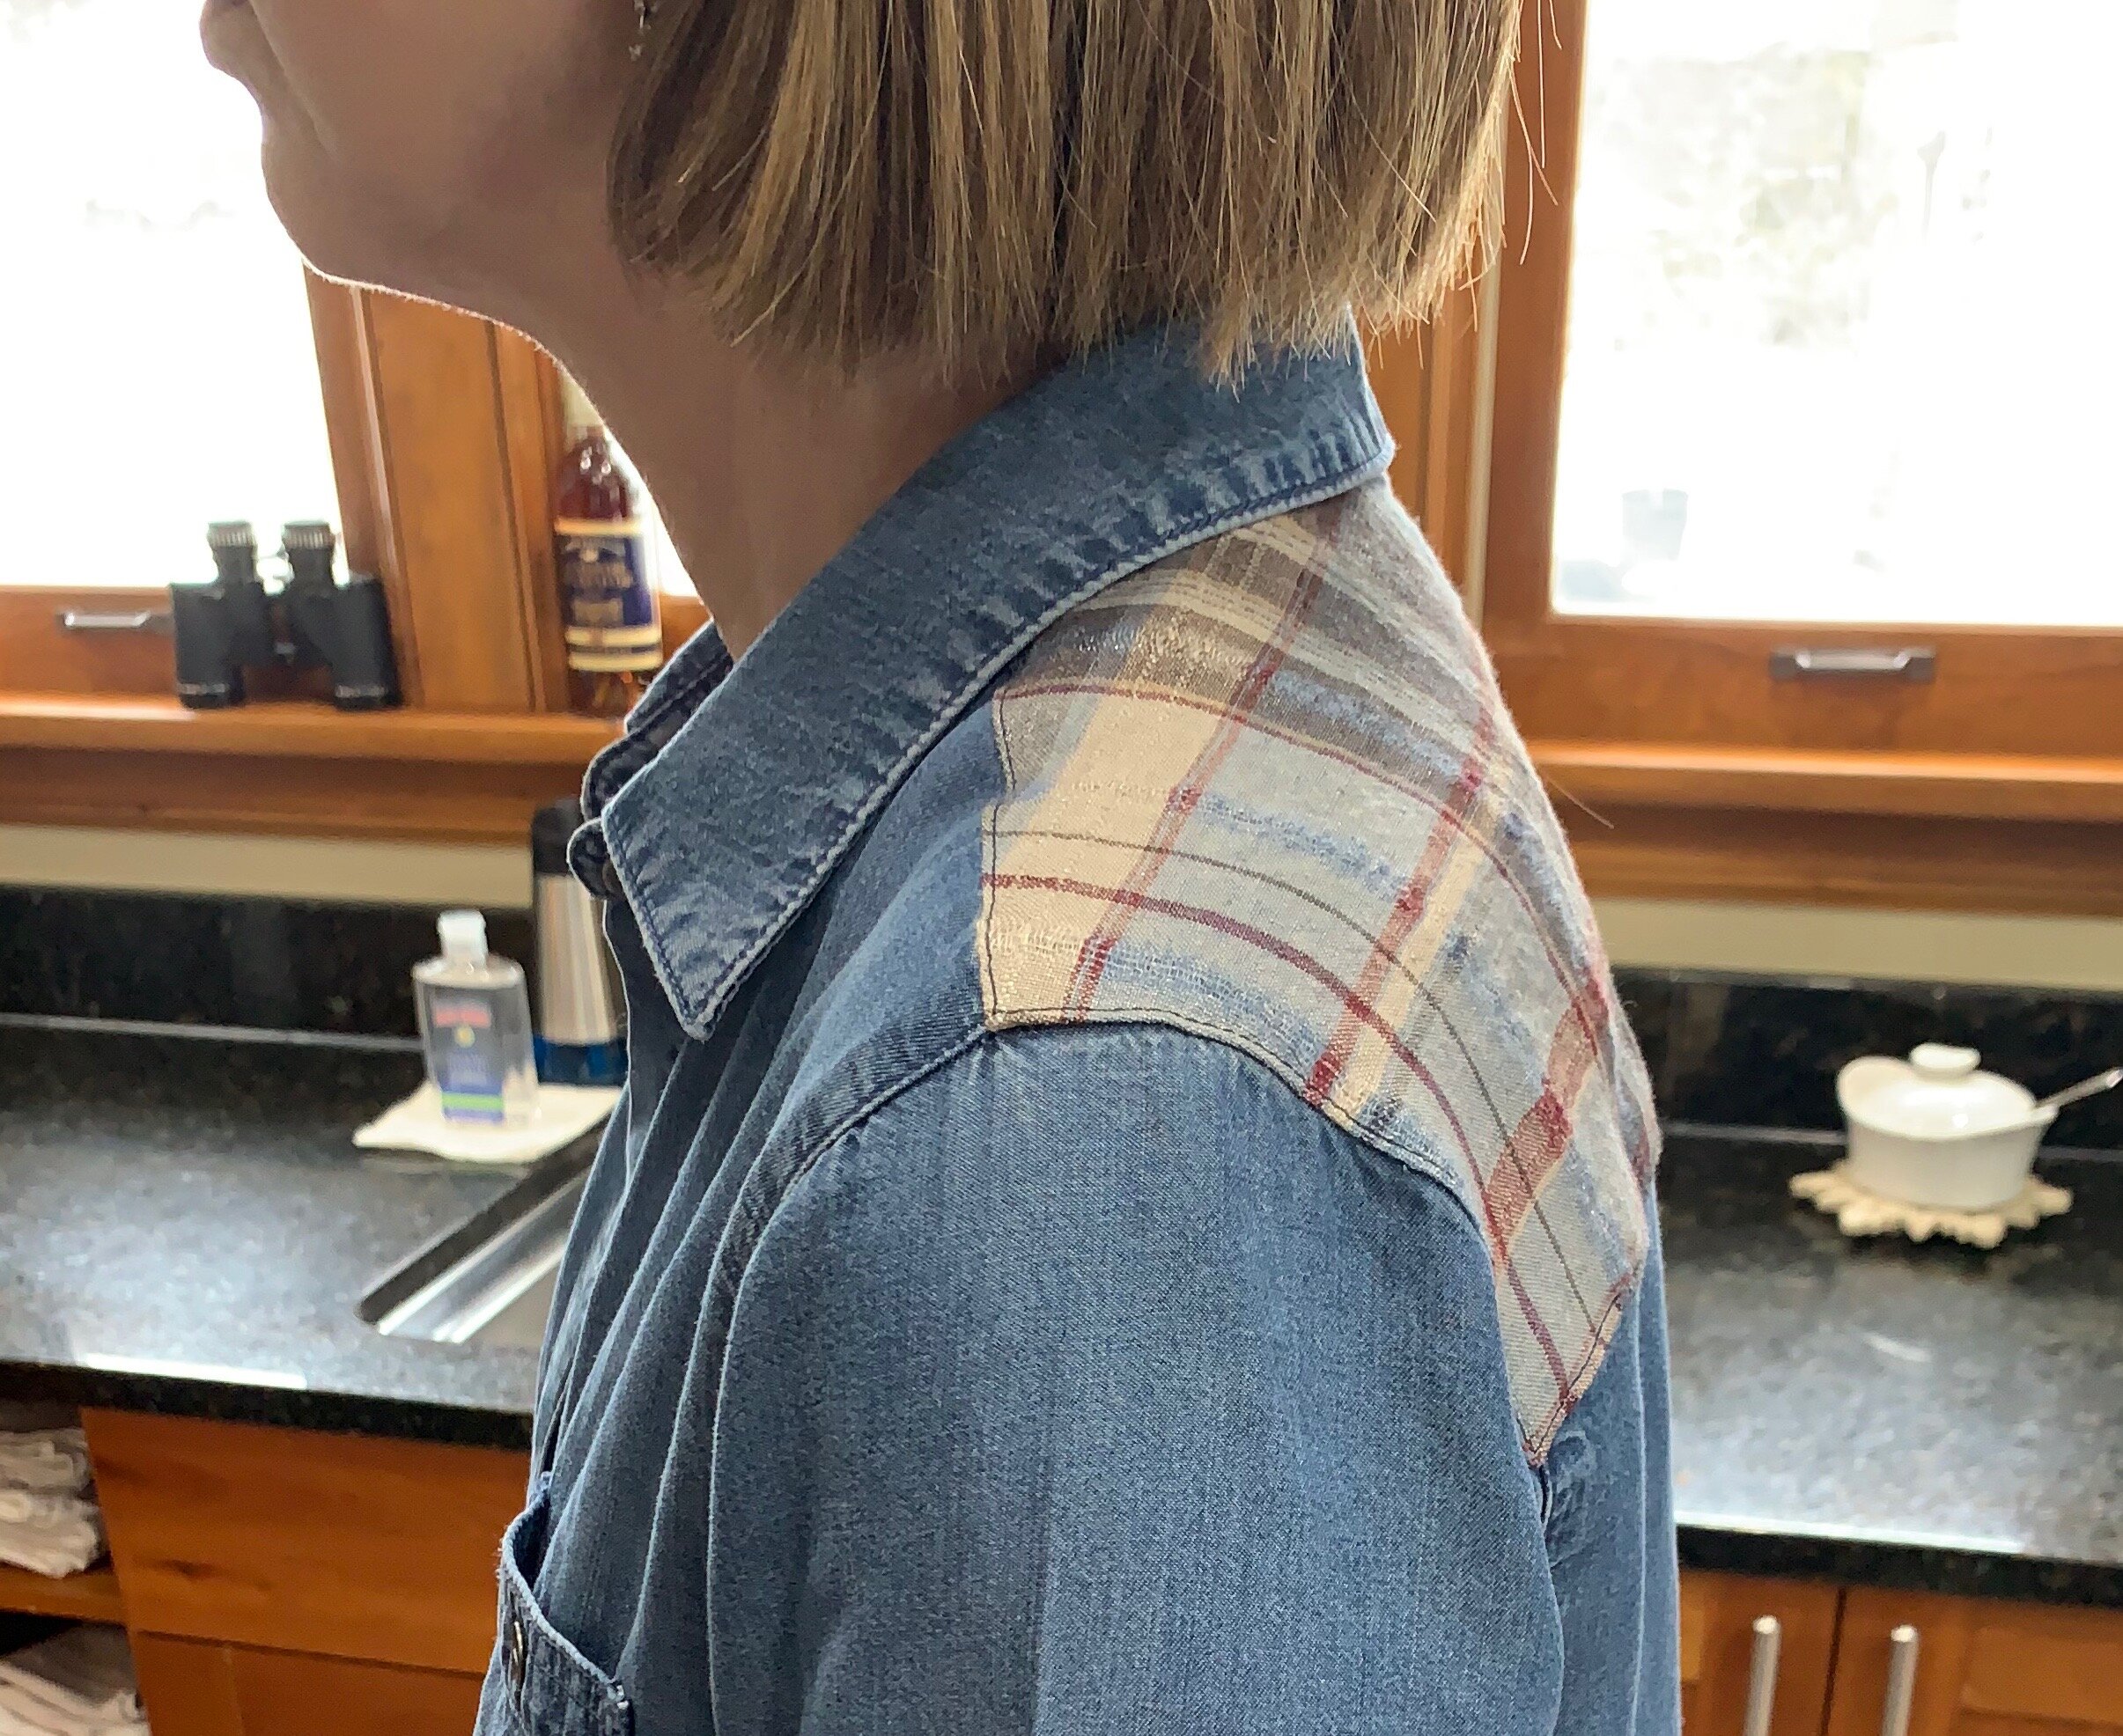
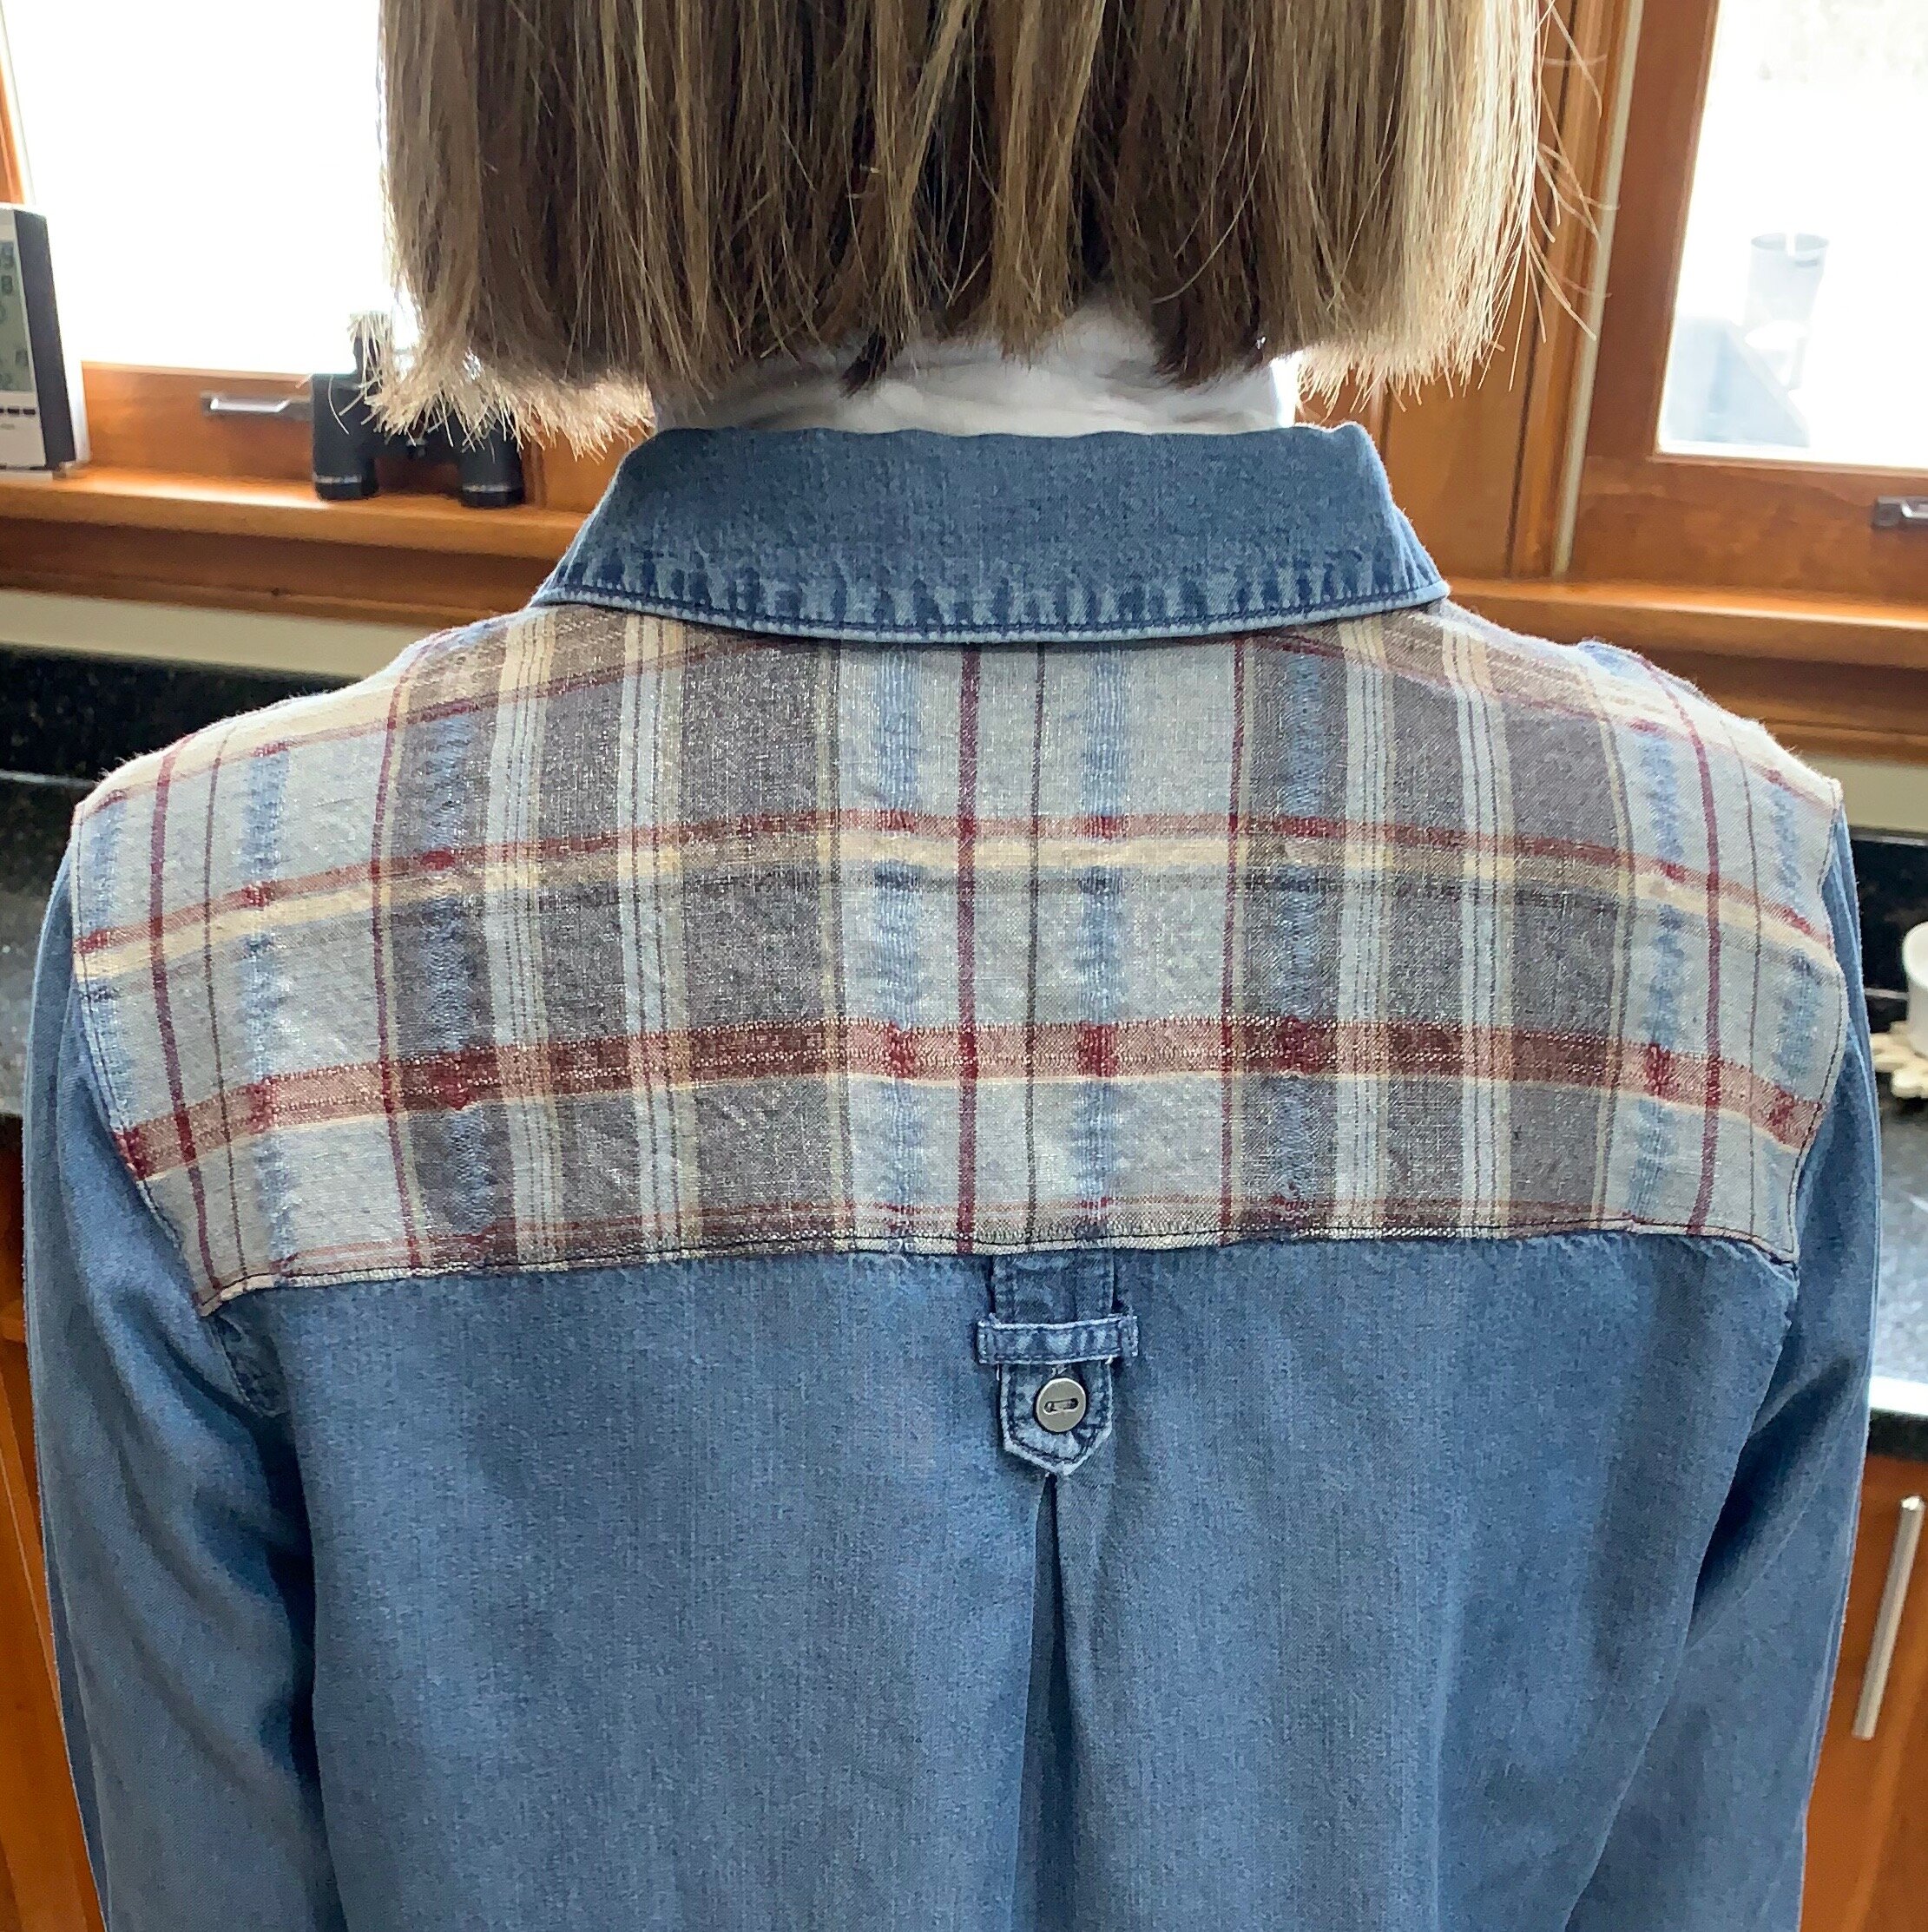
Linda is a shirt-and-jeans kind of laid-back girl, so Project Five was a shirt. We believe a woven shirt is a great skill builder: topstitching, buttonholes, fitted shoulders, plackets, collars, and cuffs. The results are pretty great, with rounded pearlized buttons. Along with three other ladies, Linda is finishing her French couture jacket. Up next, pants!

Here is what working with Linda has taught us…..it is a great idea to take a basic sewing course if you are a beginner, but never be afraid to dive right in and learn by just SEWING.

Pattern Fitting Tips, by Gail Kelley

One of the reasons I started The Sewing Hive is because I remember being so frustrated with finding beautiful material, mostly when I traveled, and a great-looking pattern, but never having the garment fit me after all the work I had put into sewing. With a busy corporate sales job, I did not have much time to devote to understanding what was wrong, but over the years, I attended many workshops and seminars to learn what I was doing incorrectly.


What I learned was that the patterns I was sewing were 2-4 sizes too small for me and that a purchased pattern is just a starting point. I needed the skills to grade and alter the pattern to fit me. I hear this frustration often, so we are on a mission to allow you to sew garments that fit!


Let’s talk about how to create a great fitting pattern:
Rule #1: DO NOT PURCHASE THE PATTERN BASED ON THE SIZE YOU PURCHASE IN A STORE BOUGHT GARMENT….. pattern sizing is not the same as Ready To Wear! Sorry, it seems as though I just yelled. (I can wear a size 6 or 8 in pants purchased from a store, but in a pattern, I’m a size 12….) This is a common frustration with beginning sewers.
The first step is to get a good set of measurements, and we can help with that and understanding how to read a pattern’s size chart. Three major measurements are listed on most patterns: bust, waist, and hips. You’ll need to have these measurements before you purchase a pattern. What type of garment you are making determines which of those measurements you should use to pick the pattern size; For a top or dress, use your bust measurement, and for a skirt or pants, use your hip measurement.
You will most likely be grading the pattern between sizes, as commercial patterns use standardized sizing. They get larger and smaller proportionally. As the bust measurement gets larger, the shoulder seams are farther out, and the waist and hips get larger.


Unless you find a pattern with multi-cup bust sizing, remember that most patterns are based on a 2” difference between your full bust measurement and your chest wall measurement, also called a High Bust measurement. If your bust measurement is more than 2 inches larger than your chest wall, you may need to learn how to make a Full Bust Adjustment. Once you learn how to do this, you can apply this new skill to any pattern you choose. Once you learn what adjustments to make, you can apply them to all your patterns, each time getting easier!


If you want to learn how to fit a pattern, please sign up for a Pattern Fitting class and bring your pattern. Your measurements will be taken, and you will learn how to apply your measurements to the pattern!
The second important lesson I learned was that the fabric needed to fit the pattern’s intended drape……but I’ll save that for next time. Time to get sewing!

Your Sewing Journey - What are the classes to become a garment maker?

We get asked this question a lot, so we know there’re many more of you wondering what classes you should take to get started sewing…..and we know we have a lot of classes, so it can be slightly overwhelming!

If you are a beginner (never have sewn, or sewn very little), then we recommend this path:

First : Our Stitch Style Create for Adults, or Children. This is a 5 week class that teaches you the basics of a sewing machine, you make 4 projects, and it ends with an understanding of commercial patterns.

Second: Our Easy Woven Shirt or T-Shirt. This is a one session class and we suggest doing the knit T-shirt so you get a taste of knit fabric sewing.

Third: Our Classic Collared Shirt (Button up Shirt) class. This is a three session class that will really start to enhance your sewing skills. You will learn how to fit a pattern, learn to sew a button placket, buttonholes, a collar, cuffs, seam finishes, and a nice hem. We have suggestions for both men’s and women’s shirt patterns listed.

Fourth: Our Pant Fitting and Technique-classes/pants-fitting-and-sewing-techniques class. This is a two session class in which you will learn the basics of fitting a pant pattern and then move on to sewing a zippered pant.

Think of the above as the Basic Requirements to have a core skill set: then you can branch out to any of our other classes that interest you: we have a ton!

We also decided that we can not know what YOU would like to make, so we offer Adult Skill Building classes where you can pick the garment and we will help you learn how to fit and sew to your style.

We offer classes on pattern fitting and finally creating your own flat sloper ( basic pattern that fits you)

We know this works….we see our students wearing clothes they Stitched, Styled, and Created.

Let’s get sewing!

Fixing My Shirt - And Understanding Why It Needed Fixed

To get through this awful weather, let alone all the other stuff, I am going through my closet and either figuring out how to fix items I never seem to enjoy wearing, or donating them. I have had a J.Jill denim looking shirt for some time. Every time I wore it, it pulled at the front neck line and I spent too much time yanking down the front collar. I knew that what was the problem: as I have aged, my shoulders have rounded and I needed more room in the back of the shirt from the back neckline to the yoke……luckily it had a yoke.

The 3 photos below give you the story. #1 look at the drag lines around the neck. #2 look how far back the shoulder seam is compared to where I have marked in photo #3.

First, I looked through my fabric stash and found a plaid metallic linen that would work since I could not reuse the existing yoke.

I removed the yoke, leaving the collar, front, parts of the sleeve, and back open for a new yoke piece. I made a simple paper pattern of the old yoke. Then I made a slash across the back of the paper from the fold line to the seam line where the sleeve would be sewn onto. I opened this slash up about 1”, taped it down to another piece of paper, straightened the fold line, and finally added additional length to the neckline so the new yoke piece would sit farther forward on my shoulders.

Here is the finished product. The drag lines are almost gone around my neck, the shirt collar is sitting on me more comfortably, and I like the look of the new yoke. Not really difficult, just took some time, but most likely less time then trying to find something else in a store. If you are having similar issues, email us and we will work with you to see what can be done to fixing your favorite garments. Happy Sewing.